Unlock the Secret to Growing Perfect Tomatoes Tips, Varieties, and More!
Growing your own Tomatoes on the Costa Blanca
Tomatoes are one of the most popular vegetables to grow in home gardens, and for good reason. They’re relatively easy to grow and provide a delicious, fresh taste that can’t be beaten by store-bought tomatoes. If you live on the Costa Blanca in Spain, you’re in luck – the region’s mild climate and long growing season make it an ideal place to grow your own tomatoes. In this article, we’ll go over some tips for growing your own tomatoes on the Costa Blanca.
Tomatoes are one of the most popular vegetables grown in Spain, and the country is known for producing some of the best tomatoes in the world. In addition to the Costa Blanca, other regions in Spain that are ideal for growing tomatoes include Andalusia, Murcia, and Valencia.
By following these tips, you can successfully grow your own tomato plants on the Costa Blanca and enjoy fresh, healthy, and delicious produce all year long.
Lets take a deep dive into some of the best tomato varieties you can grow on the Costa Blanca
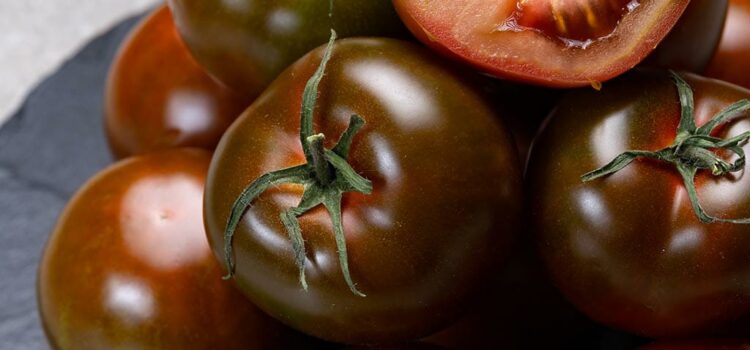
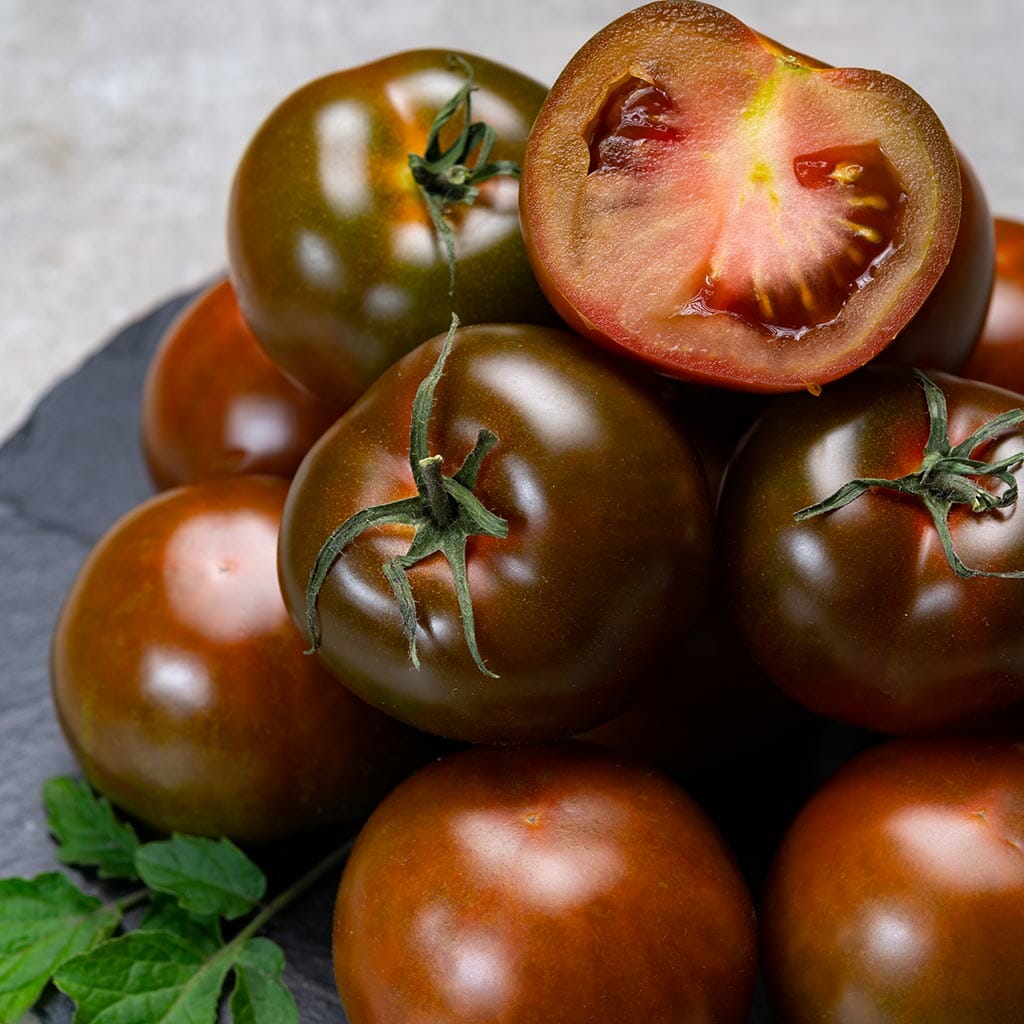
Kumato Tomato Dark brown color and sweet with an earthy flavor
The Kumato tomato is a unique variety that is highly prized for its rich, sweet flavor and unusual dark brown color. This tomato was developed in Spain and was introduced to the market in the early 2000s. It is a hybrid variety that was created by crossing different tomato varieties to produce a fruit that is both visually striking and delicious to eat.
One of the most distinctive features of the Kumato tomato is its dark brown color, which is the result of a high concentration of pigments called anthocyanins. The tomato’s skin is smooth and shiny, and the flesh inside is a deep red-brown color. The fruit is medium-sized, weighing between 80-120 grams, and has a slightly oval shape.
When it comes to taste, the Kumato tomato is known for its sweet, earthy flavor that is reminiscent of caramel or honey. The flesh is firm and juicy, with a meaty texture that is perfect for slicing and eating fresh. The tomato’s flavor is enhanced by its high sugar content and balanced acidity, which gives it a unique and delicious taste.
Another advantage of the Kumato tomato is that it is highly resistant to disease and can tolerate high temperatures, making it an ideal choice for growing in warm and sunny regions like the Costa Blanca. The plant is a prolific producer, and with proper care, can yield a large number of fruit throughout the growing season.
Overall, the Kumato tomato is an excellent choice for those who want to add some variety to their tomato garden or to their plate. With its unique appearance, sweet flavor, and disease resistance, it is a tomato that is sure to impress.
Kumato Tomato Plants: Growing and Care Guide
- Choose a sunny location: Kumato tomatoes require a lot of sunlight to grow properly, so it is important to choose a location that receives at least 6-8 hours of direct sunlight per day. Look for a spot in your garden or on your balcony that is sheltered from strong winds and has well-drained soil.
- Prepare the soil: Kumato tomatoes require well-drained soil with a pH of around 6.5-7.5. You can use a soil testing kit to check the pH level of your soil. If the pH is too low, you can add lime to raise it. If the pH is too high, you can add sulfur to lower it. You should also mix some compost or organic matter into the soil to improve its fertility.
- Choose the right tomato seeds: When it comes to choosing Kumato tomato seeds, it is important to select high-quality seeds from a reputable supplier. You can either purchase seeds from a garden center or order them online. Choose seeds that are fresh and viable.
- Plant the seeds: Once you have prepared the soil and selected the seeds, it’s time to plant them. Sow the seeds in early spring, around mid-March. Plant the seeds in rows, with a distance of about 60cm between each row. Cover the seeds with a thin layer of soil and water them gently.
- Water the plants regularly: Kumato tomatoes require consistent moisture to grow properly. Water the plants regularly, but be careful not to overwater them. Too much water can cause the roots to rot. You should also avoid getting water on the leaves, as this can cause diseases.
- Fertilize the plants: Kumato tomatoes require regular fertilization to maintain their growth and fruit production. You can use a balanced fertilizer once every two weeks during the growing season. You can also use organic fertilizers like compost or manure.
- Prune the plants: Once the plants have grown to a height of around 30cm, you can begin pruning them. Prune the plants by removing the lower branches and leaves, leaving only the top branches intact. This will help to improve air circulation and reduce the risk of diseases.
- Harvest the tomatoes: Kumato tomatoes are typically ready for harvest around 70-80 days after planting. They should be firm and have a deep brown color when ripe. To harvest the tomatoes, simply twist them gently off the stem. Store the tomatoes in a cool, dry place until ready to use.
In conclusion, growing Kumato tomatoes on the Costa Blanca is easy and straightforward. With the right soil, sunlight, water, and fertilizer, you can produce a bountiful crop of these delicious and unique tomatoes. So, get your gardening gloves on and start planting your Kumato tomato seeds today!
Cherry Tomatoes Sweet and Juicy
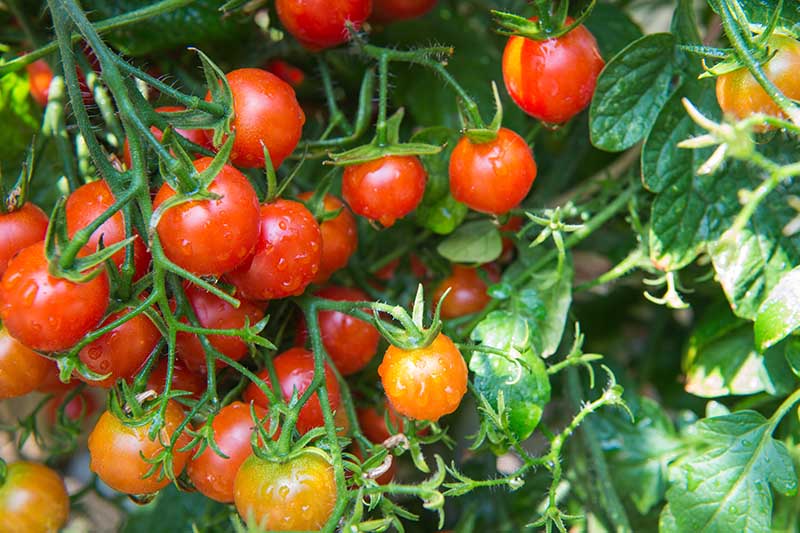
The cherry tomato is a popular variety of tomato that is well-known for its small, bite-sized fruit. These tomatoes are typically round or oval-shaped and range in color from bright red to yellow, orange, and even black. The cherry tomato is a member of the Solanaceae family and is native to South America, but is now widely grown and enjoyed all over the world.
One of the key advantages of the cherry tomato is its size. The small fruit makes it an excellent choice for snacking on, adding to salads, or using as a garnish. Its small size also makes it ideal for container gardening, and many people choose to grow cherry tomatoes in pots or hanging baskets on balconies or patios.
When it comes to taste, cherry tomatoes are known for their sweet, juicy flavor. They have a thin skin and a soft, tender flesh that is bursting with flavor. The flavor of cherry tomatoes can vary depending on the specific variety, but in general, they are sweeter and less acidic than larger tomato varieties.
Cherry tomatoes are also easy to grow and are generally quite hardy. They are often used as a beginner’s tomato, as they require less space, care, and attention than other tomato varieties. The plants are compact, bushy, and can produce an abundance of fruit over a long period.
In summary, the cherry tomato is a popular and versatile variety of tomato that is loved for its small size, sweet flavor, and ease of growing. Whether eaten straight off the vine, added to a salad, or cooked in a variety of dishes, cherry tomatoes are a delicious and nutritious addition to any meal.
How To Grown Cherry Tomatoes On The Costa Blanca
- Choose a sunny spot: Cherry tomatoes need plenty of sunlight to grow and produce fruit, so choose a spot in your garden or on your balcony that gets at least 6-8 hours of direct sunlight per day.
- Prepare the soil: Before planting, prepare the soil by loosening it and adding compost or other organic matter to improve its fertility and drainage.
- Plant the seeds: Cherry tomatoes can be grown from seeds or seedlings. If planting from seeds, sow them directly in the soil or in small pots 6-8 weeks before the last expected frost date. Cover the seeds with a thin layer of soil, and keep them moist until they germinate.
- Water regularly: Cherry tomatoes need consistent moisture to grow and produce fruit, so water them regularly and deeply, especially during hot and dry weather.
- Provide support: As cherry tomato plants grow, they will need support to keep them from falling over. You can use stakes, cages, or trellises to support the plants and keep them upright.
- Fertilize: Cherry tomatoes are heavy feeders and require regular fertilization throughout the growing season. Use a balanced fertilizer or a fertilizer specifically designed for tomatoes.
- Harvest: Cherry tomatoes are ready to harvest when they are fully ripe and have a deep, rich color. Pick the fruit when it is plump and firm, and avoid letting it over-ripen on the vine. Cherry tomatoes will continue to produce fruit throughout the growing season, so be sure to pick them regularly to encourage more growth.
By following these simple steps, you can grow a bountiful crop of sweet and delicious cherry tomatoes in your garden or on your balcony.
The Marmande Tomato Rich, Meaty Flavor
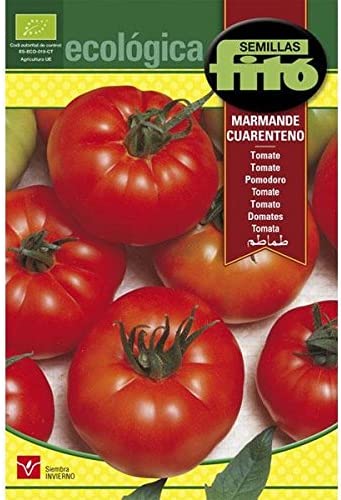
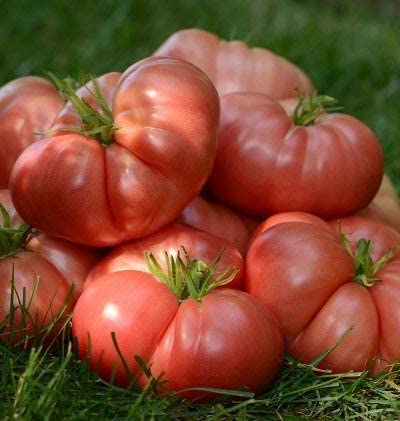
The Marmande tomato is a popular heirloom variety of tomato that originated in France. This variety is known for its large, meaty fruit, complex flavor, and distinctive ribbed appearance. The Marmande tomato is a member of the beefsteak tomato family and is a favorite among tomato enthusiasts and chefs alike.
One of the most distinctive features of the Marmande tomato is its large size. The fruit can weigh up to 1 pound and has a diameter of 4-5 inches. Its shape is slightly flattened and ribbed, giving it a unique appearance that sets it apart from other tomato varieties. The skin of the Marmande tomato is a deep red color, and the flesh is dense and meaty, with a low seed count.
When it comes to taste, the Marmande tomato is renowned for its rich, complex flavor. It has a slightly sweet and tangy taste with a subtle acidity that balances the sweetness. The flesh is firm and juicy, making it an excellent choice for slicing and using in salads or sandwiches. The Marmande tomato is also a great option for cooking, as its thick flesh holds up well to heat and maintains its flavor.
Another advantage of the Marmande tomato is its high productivity. The plants are vigorous and produce a large number of fruit throughout the growing season, making it a favorite among gardeners who want a bountiful crop. The Marmande tomato is also disease-resistant, making it a reliable and low-maintenance variety to grow.
In summary, the Marmande tomato is a flavorful and visually striking heirloom tomato variety that is beloved by many. Its large size, ribbed appearance, and meaty texture make it a versatile choice for cooking and eating fresh, while its disease resistance and high productivity make it a reliable and low-maintenance variety to grow.
Germinating and Growing Marmande Tomatoes
- Choose a sunny spot: Marmande tomatoes need plenty of sunlight to grow and produce fruit, so choose a spot in your garden that gets at least 6-8 hours of direct sunlight per day.
- Prepare the soil: Before planting, prepare the soil by loosening it and adding compost or other organic matter to improve its fertility and drainage.
- Plant the seedlings: Marmande tomatoes are typically grown from seedlings rather than seeds. Plant the seedlings in the soil at a depth that covers the stem up to the first set of leaves.
- Water regularly: Marmande tomatoes need consistent moisture to grow and produce fruit, so water them regularly and deeply, especially during hot and dry weather.
- Provide support: As Marmande tomato plants grow, they will need support to keep them from falling over. You can use stakes, cages, or trellises to support the plants and keep them upright.
- Fertilize: Marmande tomatoes are heavy feeders and require regular fertilization throughout the growing season. Use a balanced fertilizer or a fertilizer specifically designed for tomatoes.
- Prune the plants: To encourage the plants to focus their energy on producing fruit, it’s a good idea to prune the Marmande tomato plants by removing any suckers or side shoots that grow between the main stem and the branches.
- Harvest: Marmande tomatoes are ready to harvest when they are fully ripe and have a deep, rich color. Pick the fruit when it is plump and firm, and avoid letting it over-ripen on the vine.
By following these simple steps, you can grow a bountiful crop of delicious and visually striking Marmande tomatoes in your garden. Remember to provide plenty of water, support, and fertilizer to help the plants thrive, and don’t forget to prune them regularly to encourage the growth of large, meaty fruit.
The San Marzano Tomato Rich, Sweet Flavor
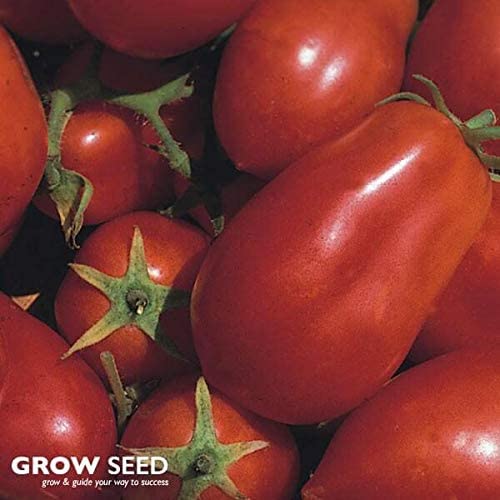
San Marzano tomatoes are a popular variety of tomato that are originally from the San Marzano region of Italy. They are a prized variety among tomato enthusiasts and chefs for their rich, sweet flavor and meaty texture, which make them ideal for use in sauces, pastes, and canning.
San Marzano tomatoes are known for their distinctive elongated shape and bright red color. They have a thick, meaty flesh and are low in seeds and water content, making them a popular choice for cooking. The flavor of San Marzano tomatoes is sweet and slightly tangy, with a low acidity that gives them a smooth and mellow taste.
Growing San Marzano tomatoes on the Costa Blanca can be challenging due to the region’s hot and dry climate. To grow them successfully, it is important to plant them in well-drained soil and provide them with plenty of water, especially during hot and dry weather. They also require a lot of sunlight to thrive and produce fruit, so it is important to choose a location that gets at least 6-8 hours of direct sunlight per day.
To get the best flavor and texture out of San Marzano tomatoes, it is recommended to let them ripen fully on the vine before harvesting. The fruit should be picked when it is plump, firm, and has a deep red color. San Marzano tomatoes can be used in a variety of recipes, from pasta sauces and stews to pizzas and salads, making them a versatile and delicious ingredient for any kitchen.
Growing San Marzano On The Costa Blanca
- Choose the right location: San Marzano tomatoes need a lot of sunlight to thrive, so choose a location that gets at least 6-8 hours of direct sunlight per day. They also prefer well-drained soil, so make sure the soil in your chosen location is loose and well-drained.
- Prepare the soil: Before planting, prepare the soil by adding compost or other organic matter to improve its fertility and drainage. San Marzano tomatoes are heavy feeders, so adding some slow-release fertilizer to the soil can also be helpful.
- Plant the seedlings: San Marzano tomatoes are typically grown from seedlings rather than seeds. Plant the seedlings in the soil at a depth that covers the stem up to the first set of leaves.
- Water regularly: San Marzano tomatoes need consistent moisture to grow and produce fruit, so water them regularly and deeply, especially during hot and dry weather. Be sure not to let the soil dry out completely between waterings.
- Provide support: As San Marzano tomato plants grow, they will need support to keep them from falling over. You can use stakes, cages, or trellises to support the plants and keep them upright.
- Fertilize: San Marzano tomatoes are heavy feeders and require regular fertilization throughout the growing season. Use a balanced fertilizer or a fertilizer specifically designed for tomatoes.
- Prune the plants: To encourage the plants to focus their energy on producing fruit, it’s a good idea to prune the San Marzano tomato plants by removing any suckers or side shoots that grow between the main stem and the branches.
- Harvest: San Marzano tomatoes are ready to harvest when they are fully ripe and have a deep, rich color. Pick the fruit when it is plump and firm, and avoid letting it over-ripen on the vine.
By following these simple steps, you can grow a bountiful crop of delicious and visually striking San Marzano tomatoes in your garden on the Costa Blanca. Remember to provide plenty of water, support, and fertilizer to help the plants thrive, and don’t forget to prune them regularly to encourage the growth of large, meaty fruit.
The Beefsteak Tomato Large Size & Meaty Texture
Beefsteak Tomatoes on the Costa Blanca: A Guide to Growing and Enjoying this Popular Variety
Beefsteak tomatoes are a favorite among home gardeners and chefs alike for their large size and meaty texture. And, if you’re on the Costa Blanca, you’re in luck – this sunny region in Spain is perfect for growing beefsteak tomatoes.
Growing Beefsteak Tomatoes on the Costa Blanca
To grow beefsteak tomatoes, you’ll need a sunny spot in your garden or balcony that gets at least 6 hours of direct sunlight per day. The ideal soil for growing beefsteak tomatoes is well-draining, nutrient-rich soil with a pH between 6.0 and 7.0.
When planting, make sure to space your tomato plants at least 2 feet apart to give them enough room to grow. Provide support for the plants with stakes or cages to keep the heavy fruits from weighing down the branches and breaking them.
Water your beefsteak tomato plants deeply and regularly, aiming for about an inch of water per week. Be careful not to overwater, as this can lead to diseases and other issues.
Harvesting and Enjoying Beefsteak Tomatoes
Beefsteak tomatoes take longer to ripen than other tomato varieties, usually taking around 80-90 days from planting to harvest. When the tomatoes are ripe, they should be firm yet slightly soft to the touch, with a deep red color.
Beefsteak tomatoes are perfect for slicing and using in sandwiches, burgers, and salads. They also make a delicious addition to grilled and roasted dishes, or simply enjoyed on their own with a sprinkle of salt and pepper.
If you’re looking to preserve your beefsteak tomatoes for later use, you can also can or freeze them for use in sauces and stews.
Conclusion
Beefsteak tomatoes are a delicious and rewarding crop to grow on the Costa Blanca. With a little bit of care and attention, you can enjoy the fruits of your labor all summer long. Whether you’re an experienced gardener or just starting out, beefsteak tomatoes are a great choice for your home garden or balcony.
Growing the Beefsteak Tomato
Sure, here’s a basic guide for growing Beefsteak tomatoes on the Costa Blanca:
- Choose the right location: Beefsteak tomatoes need a lot of sunlight to thrive, so choose a location that gets at least 6-8 hours of direct sunlight per day. They also prefer well-drained soil, so make sure the soil in your chosen location is loose and well-drained.
- Prepare the soil: Before planting, prepare the soil by adding compost or other organic matter to improve its fertility and drainage. Beefsteak tomatoes are heavy feeders, so adding some slow-release fertilizer to the soil can also be helpful.
- Plant the seedlings: Beefsteak tomatoes are typically grown from seedlings rather than seeds. Plant the seedlings in the soil at a depth that covers the stem up to the first set of leaves.
- Water regularly: Beefsteak tomatoes need consistent moisture to grow and produce fruit, so water them regularly and deeply, especially during hot and dry weather. Be sure not to let the soil dry out completely between waterings.
- Provide support: As Beefsteak tomato plants grow, they will need support to keep them from falling over. You can use stakes, cages, or trellises to support the plants and keep them upright.
- Fertilize: Beefsteak tomatoes are heavy feeders and require regular fertilization throughout the growing season. Use a balanced fertilizer or a fertilizer specifically designed for tomatoes.
- Prune the plants: To encourage the plants to focus their energy on producing fruit, it’s a good idea to prune the Beefsteak tomato plants by removing any suckers or side shoots that grow between the main stem and the branches.
- Monitor for pests and diseases: Beefsteak tomatoes can be vulnerable to a variety of pests and diseases, so it’s important to monitor them regularly for signs of infestation or infection. Remove any damaged or diseased leaves or fruit to prevent the spread of disease.
- Harvest: Beefsteak tomatoes are ready to harvest when they are fully ripe and have a deep, rich color. Pick the fruit when it is plump and firm, and avoid letting it over-ripen on the vine.
By following these simple steps, you can grow a bountiful crop of juicy and flavorful Beefsteak tomatoes in your garden on the Costa Blanca. Remember to provide plenty of water, support, and fertilizer to help the plants thrive, and don’t forget to monitor them regularly for signs of pests or diseases.
Tomatoes are an essential ingredient in many cuisines worldwide
Tomatoes are a versatile ingredient that can be used in a wide variety of dishes. Here are some examples of good food dishes you can use tomatoes in:
Caprese salad – Tomatoes are a key ingredient in this classic Italian salad, along with fresh mozzarella cheese and basil leaves.
Tomato sauce – Tomatoes are the base for many pasta sauces, including classic marinara and bolognese.
Gazpacho – This cold Spanish soup is made with tomatoes, cucumbers, peppers, and other fresh ingredients.
Tomato soup – A comforting classic, tomato soup is easy to make and pairs well with grilled cheese sandwiches.
Bruschetta – This simple appetizer consists of toasted bread topped with fresh chopped tomatoes, garlic, and basil.
Ratatouille – This French vegetable stew features tomatoes, eggplant, zucchini, and peppers.
Shakshuka – This Middle Eastern breakfast dish is made with tomatoes, peppers, onions, and spices, all cooked together with eggs.
Tomato and mozzarella tart – This savory tart features sliced tomatoes and fresh mozzarella cheese baked in a buttery crust.
Tomato and basil pasta – A simple yet satisfying pasta dish that features fresh tomatoes and basil, along with garlic and olive oil.
Stuffed tomatoes – Tomatoes can be stuffed with a variety of fillings, such as rice, meat, or cheese, and baked until tender.
How To Make a Spicy Tomato Soup
Here’s a recipe for a spicy tomato soup made with fresh tomatoes:
Ingredients:
- 2-3 pounds fresh tomatoes, chopped
- 1 onion, diced
- 2-3 cloves garlic, minced
- 2 teaspoons cumin
- 1/2 teaspoon smoked paprika
- 1/4 teaspoon cayenne pepper
- 2 cups vegetable or chicken broth
- Salt and pepper, to taste
- 1/4 cup heavy cream (optional)
- Fresh cilantro or parsley, chopped (for garnish)
Instructions:
- In a large pot or Dutch oven, heat a few tablespoons of olive oil over medium-high heat. Add the chopped onion and sauté until softened, about 5-7 minutes.
- Add the minced garlic, cumin, smoked paprika, and cayenne pepper to the pot, and cook for another 1-2 minutes, stirring constantly.
- Add the chopped fresh tomatoes and vegetable or chicken broth to the pot, and bring to a boil. Reduce the heat to low, cover the pot, and simmer for 30-40 minutes, until the tomatoes are very tender.
- Use an immersion blender to blend the soup until it is smooth and creamy. Alternatively, transfer the soup in batches to a blender and blend until smooth. Be careful not to fill the blender too full, as hot liquids can expand and overflow.
- Season the soup with salt and pepper to taste, and stir in the heavy cream if using. Heat the soup over low heat until it is warmed through.
- Serve the soup hot, garnished with fresh cilantro or parsley.
This spicy tomato soup made with fresh tomatoes is a delicious and healthy way to use up an abundance of ripe tomatoes, and the addition of spices gives it a wonderful depth of flavor. Enjoy!
How To Make a Spicy Tomato and Sausage Pasta Bake
Ingredients:
- 1 pound pasta, such as penne or rigatoni
- 1 pound spicy Italian sausage, casings removed
- 2-3 large tomatoes, chopped
- 1 onion, chopped
- 4-5 cloves garlic, minced
- 1 teaspoon dried oregano
- 1/2 teaspoon red pepper flakes
- Salt and pepper, to taste
- 1/4 cup fresh basil, chopped
- 2 cups shredded mozzarella cheese
Instructions:
- Preheat the oven to 375°F. Cook the pasta according to package instructions until al dente, then drain and set aside.
- In a large skillet or Dutch oven, cook the sausage over medium-high heat, breaking it up with a wooden spoon, until browned and cooked through. Remove the sausage from the skillet and set aside.
- Add the chopped onion to the skillet and sauté until softened, about 5-7 minutes. Add the minced garlic, dried oregano, and red pepper flakes to the skillet, and cook for another minute or two.
- Add the chopped tomatoes to the skillet and cook until they begin to break down and release their juices, about 10-15 minutes. Season the tomato sauce with salt and pepper to taste.
- Add the cooked pasta and sausage to the skillet with the tomato sauce, and stir to combine. Transfer the mixture to a large baking dish.
- Sprinkle the shredded mozzarella cheese over the top of the pasta mixture, and bake in the preheated oven for 15-20 minutes, until the cheese is melted and bubbly.
- Remove the pasta bake from the oven and let it cool for a few minutes before serving. Garnish with chopped fresh basil.
This spicy tomato and sausage pasta bake is a crowd-pleasing hot dish that’s perfect for a hearty weeknight dinner or a weekend gathering with friends and family. Enjoy!
Here are some other Chile seeds you can take a look at
Here are some common Questions about growing Chile’s
What is the best fertiliser for chili plants?
The best fertilizer for chili plants depends on the specific needs of your plants and soil conditions. However, a balanced, slow-release fertilizer with equal parts of nitrogen (N), phosphorus (P), and potassium (K) can be a good choice. A good NPK ratio for chili plants could be 10-10-10 or a slightly higher concentration of potassium like 13-13-20.
It’s also important to consider the soil pH level for chili plants, which prefer a slightly acidic soil with a pH of around 5.5 to 7.0. If the soil pH is too high or too low, you can adjust it by adding the appropriate soil amendment such as sulfur to lower pH or limestone to raise it.
In addition to balanced fertilizer, chili plants can also benefit from supplementary applications of calcium, magnesium, and other micronutrients as needed.
Remember that over-fertilizing can be harmful to chili plants, so always follow the recommended application rates and frequency on the fertilizer label.
Can I leave ripe chilies on the plant?
Yes, you can leave ripe chili peppers on the plant. In fact, allowing the chili peppers to mature fully on the plant can improve their flavor and nutritional value. When chili peppers are allowed to mature to their full red or yellow color, they have reached their maximum level of sweetness and have also accumulated the highest amount of carotenoids, which are important phytochemicals that have numerous health benefits.
Leaving the chili peppers on the plant also allows the plant to focus its energy on producing more flowers and fruit, which can result in an increased yield. However, if you live in an area with a lot of rainfall or humidity, you may want to pick the chili peppers before they become overripe to prevent mold or fungal growth.
Once you have harvested the chili peppers, you can store them in a cool, dry place for several weeks or even months, depending on the variety and how well they are stored.
Are chilies hard to grow?
Chilies can be relatively easy to grow, but like any other plant, they have specific needs that must be met in order to thrive. Here are a few key things to keep in mind when growing chili peppers:
- Light: Chili peppers prefer full sun, so make sure to plant them in a location that gets at least 6-8 hours of direct sunlight per day.
- Soil: Chili peppers prefer well-draining soil that is rich in organic matter. Adding compost or other organic matter to the soil before planting can help to improve its fertility and structure.
- Water: Chili peppers need consistent moisture, but they should not be kept constantly wet. Water the plants deeply, but allow the soil to dry out slightly between waterings.
- Fertilizer: Chili peppers benefit from a balanced fertilizer, such as a 10-10-10 or 13-13-13 blend, applied every 4-6 weeks during the growing season.
- Temperature: Chili peppers are native to warm climates and prefer temperatures between 70-85°F. They may struggle to set fruit or grow properly in cooler temperatures.
Overall, with proper care and attention to these needs, chili peppers can be a relatively easy plant to grow. Just remember to be patient, as chili peppers can take several months to mature and produce fruit.
Do chili plants come back every year?
Chili plants are typically grown as annuals, which means they are grown from seed, produce fruit, and then die within a single growing season. They do not typically come back the following year. However, in warm climates with long growing seasons, it is possible for chili plants to survive and re-grow from the roots in subsequent years.
If you live in an area with a more moderate climate, you can still enjoy fresh chili peppers each year by starting new plants from seed each spring. With proper care, these plants will produce an abundant harvest of chili peppers, which can be enjoyed fresh, dried, or preserved for later use.
Keep in mind that if you save seeds from one year’s chili pepper harvest to start the next year’s plants, the resulting plants may not be true to type, as chili peppers can cross-pollinate and produce hybrid offspring. To ensure that you are growing the same variety of chili pepper each year, it’s best to start with fresh seed from a reputable seed supplier.
How long does it take for chilies to grow?
The time it takes for chili peppers to grow depends on several factors, including the variety of chili pepper being grown, growing conditions, and the climate.
Typically, chili pepper seeds germinate within 7-14 days and then grow into seedlings, which can be transplanted into the garden or containers when they have several true leaves and are at least 4-6 inches tall. From there, it can take anywhere from 2-4 months for the chili peppers to mature and produce fruit.
Smaller, hotter chili peppers, such as jalapenos, typically mature faster and can be harvested within 70-80 days from transplanting. Larger, milder chili peppers, such as bell peppers, can take longer, up to 90-100 days or more.
Remember, the actual time it takes for chili peppers to mature and produce fruit can be affected by several factors, including the growing conditions, temperature, and the amount of light and water the plants receive. So, while the average time to maturity is 2-4 months, it may take longer or shorter depending on your specific growing conditions.
How many chilies can one plant produce?
The number of chili peppers that a single plant can produce can vary widely depending on several factors, including the variety of chili pepper, growing conditions, and the climate. Some chili pepper varieties can produce just a few fruits, while others can produce several dozen or more.
Here are a few factors that can affect the yield of chili pepper plants:
- Variety: Different chili pepper varieties have different yields, with some producing just a few peppers and others producing dozens or even hundreds of fruits.
- Growing conditions: Adequate sunlight, water, and nutrients are essential for good chili pepper production. Chili pepper plants grown in ideal conditions are likely to produce a larger yield than those grown in less ideal conditions.
- Climate: Chili peppers are native to warm climates and grow best in temperatures between 20-30 degress. In climates with cooler temperatures or shorter growing seasons, chili pepper plants may produce fewer fruits or take longer to mature.
- Care: Regular pruning and training can help to increase the yield of chili pepper plants by encouraging new growth and allowing for better light penetration.
In general, a single chili pepper plant can produce anywhere from a few to several dozen or more peppers, depending on the variety and growing conditions. If you are looking to maximize your yield, consider growing multiple plants and providing them with the best possible growing conditions.
In Conclusion
Growing your own chili peppers can be a rewarding and delicious experience. Whether you enjoy the heat of a fiery habanero or the mild sweetness of a bell pepper, there is a chili pepper variety out there for everyone. By providing your chili pepper plants with the proper care and growing conditions, you can enjoy an abundant harvest of fresh chili peppers to add to your favorite dishes. From salsas and sauces to marinades and spice blends, the possibilities are endless when it comes to incorporating chili peppers into your cooking. So why not give it a try and enjoy the benefits of growing your own chili peppers today!
The reviews on this page reflect the author’s personal opinions and should not be considered as a guarantee of accuracy. The responsibility for any unsatisfactory purchases lies solely with the individual making the purchase and not with the author or this platform. A commission may be earned on purchases made through links on this page

Everything Home and Garden: Exciting New Products and Services to Enhance Your Home and Garden Experience”

